GitHub Autolink
Boost Productivity with GitHub Autolink References: Seamlessly Link GitHub Issues to JIRA, Asana, and More

If you’re tired of manually linking GitHub issues or pull requests to external platforms like JIRA or Asana, then GitHub’s Autolink References feature is here to make your life easier. With this simple setup, you can automatically link GitHub references to external systems, improving team productivity and saving time. Let’s dive into how to configure autolinks in GitHub and supercharge your workflow!
Problem
The Pain of Manual Linking Between GitHub and JIRA
TASK-456 in GitHub could automatically generate a link to the corresponding task or issue in your project management tool—that’s what GitHub Autolink References can do!Solution
Automatically Link GitHub Issues with Autolink References
Why
Using GitHub Autolink References comes with several benefits
- Increased Efficiency No more copy-pasting URLs manually.
- Improved Organization Clear links to external resources in issues and commits.
- Streamlined Workflow Consistent reference format across your team.
Requirements
Before we start, here’s what you’ll need
- GitHub Admin Access for your repository.
- A GitHub Pro, Team, or Enterprise Plan to enable the feature.
- The URL Structure of the system you want to link, like
https://jira.example.com/browse/.
Step by Step
How to Set Up Autolink References in GitHub
Follow these simple steps to configure GitHub autolinks
Step 1: Open Repository Settings
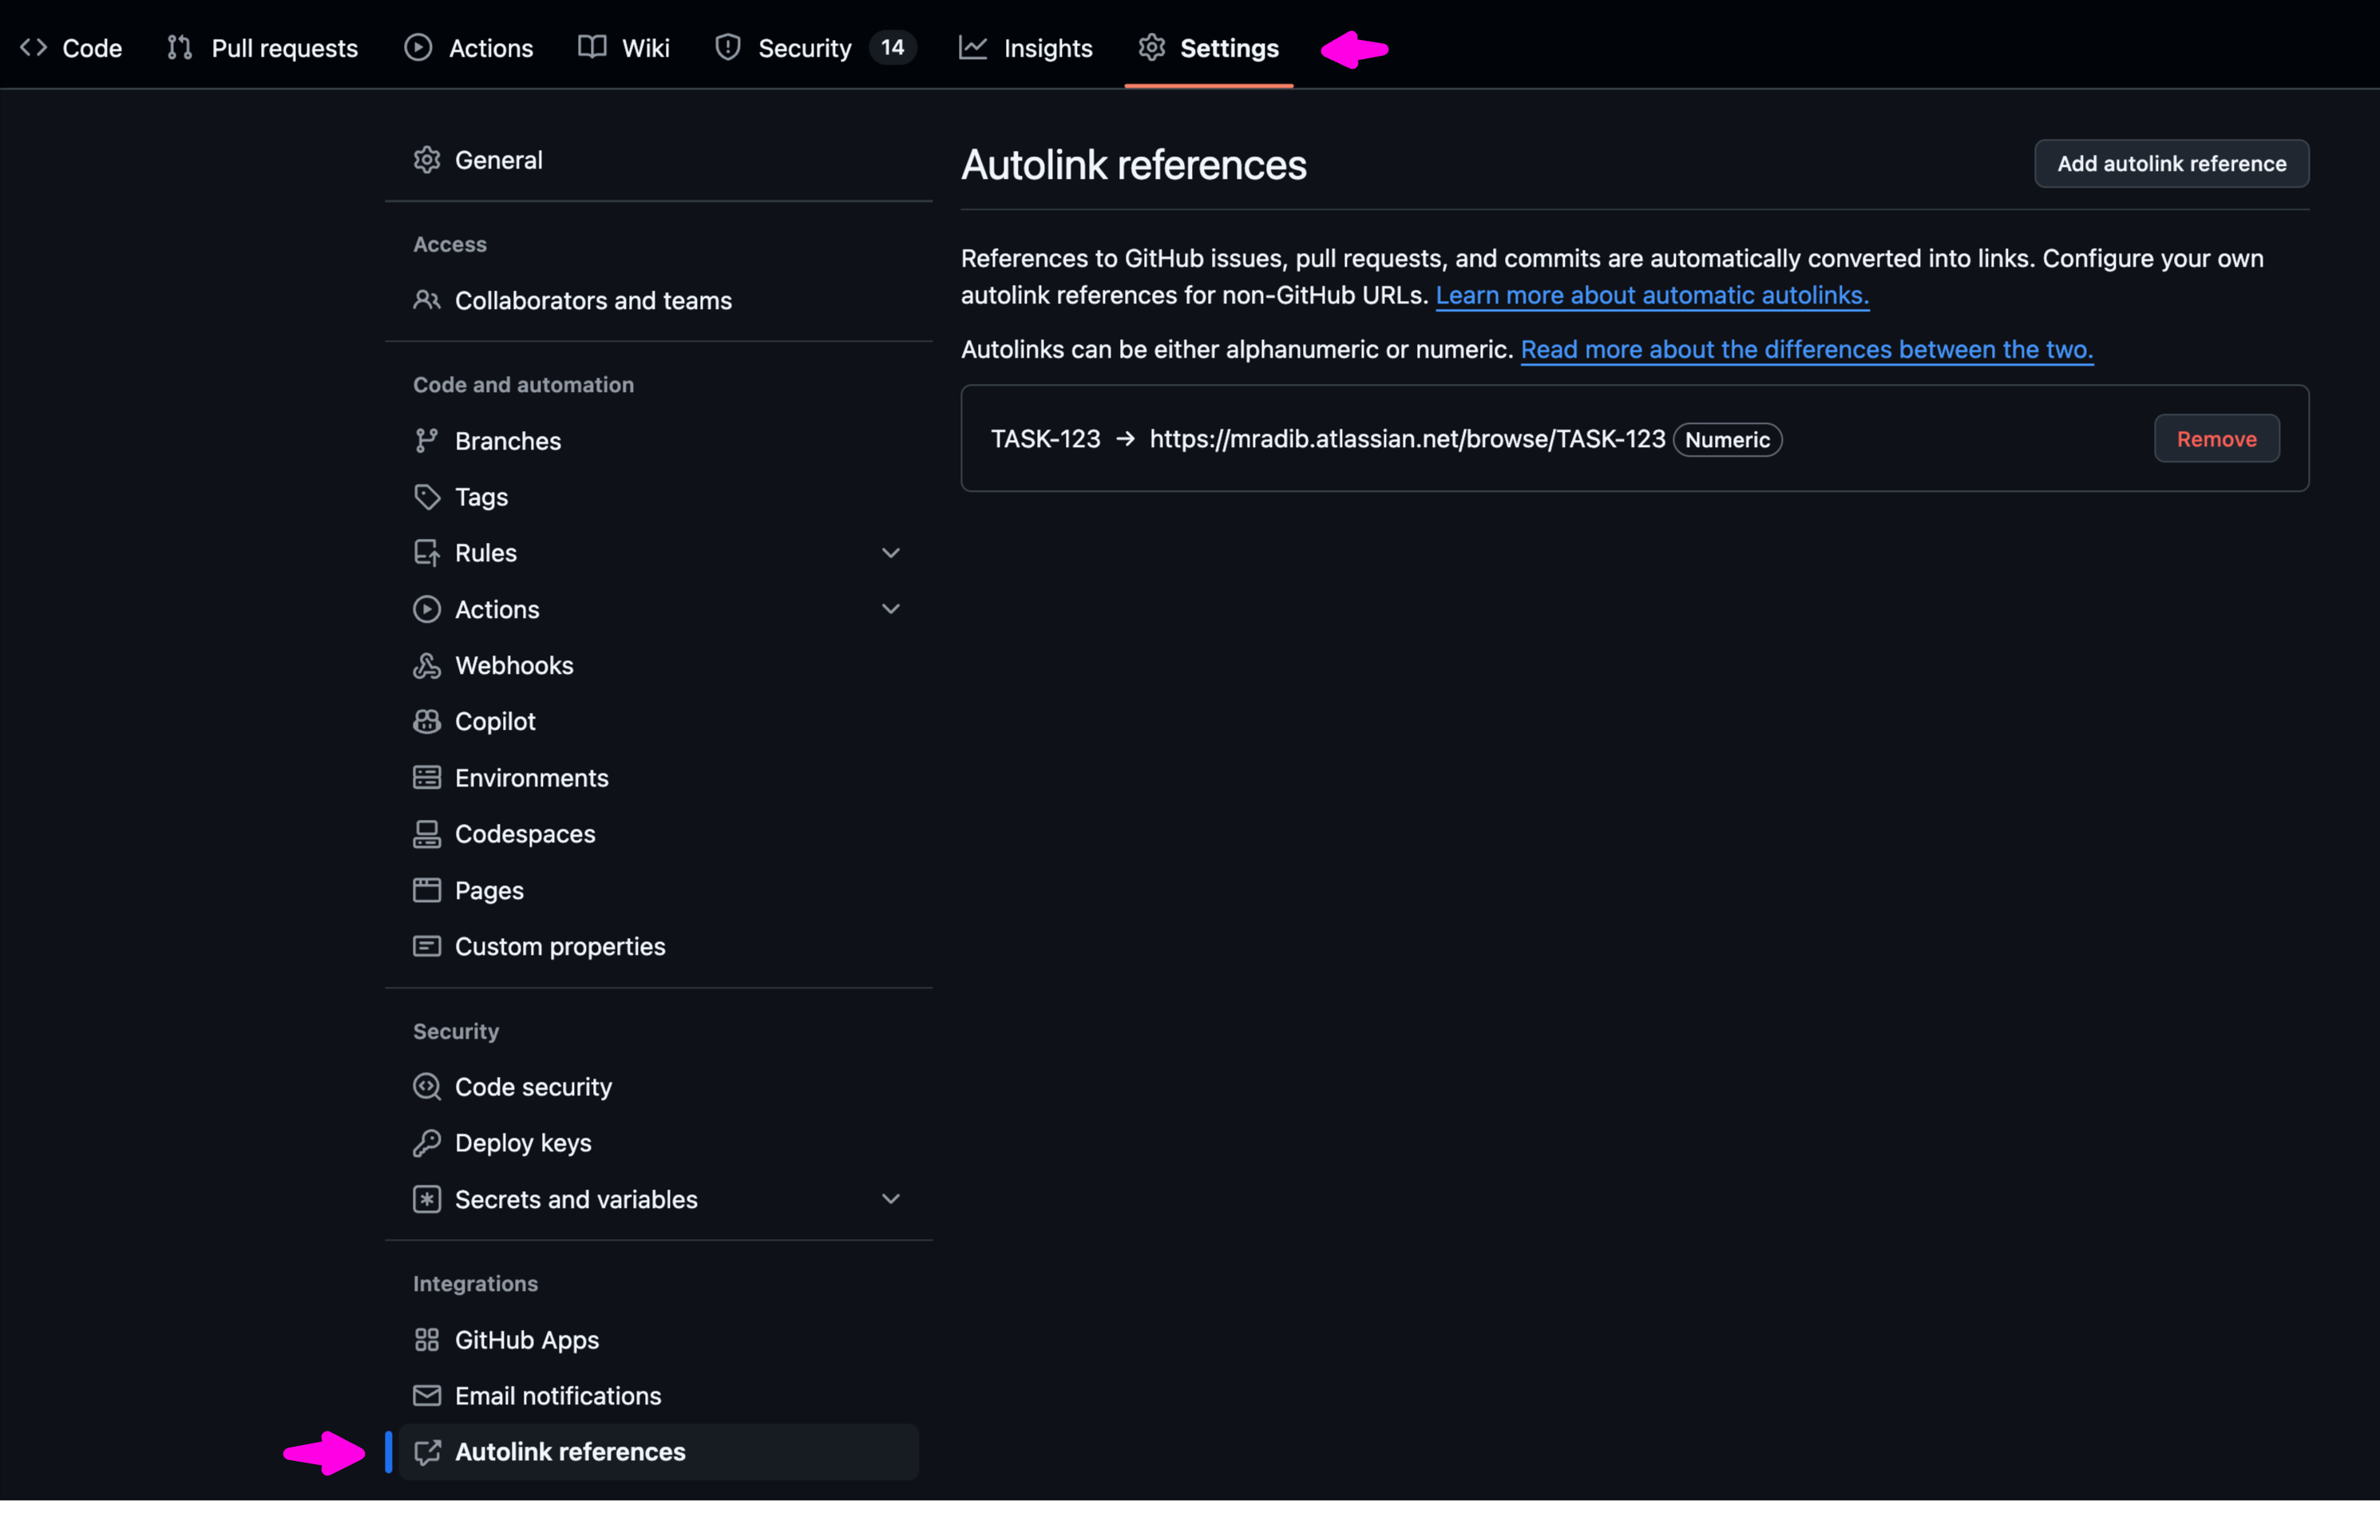
In your GitHub repository, go to Settings under your repository’s name.
Step 2: Access Autolink References
In the sidebar, locate the Integrations section and click on Autolink references.

Step 3: Add a New Autolink Reference
Click Add autolink reference. This is where you’ll define the rules for automatic linking.
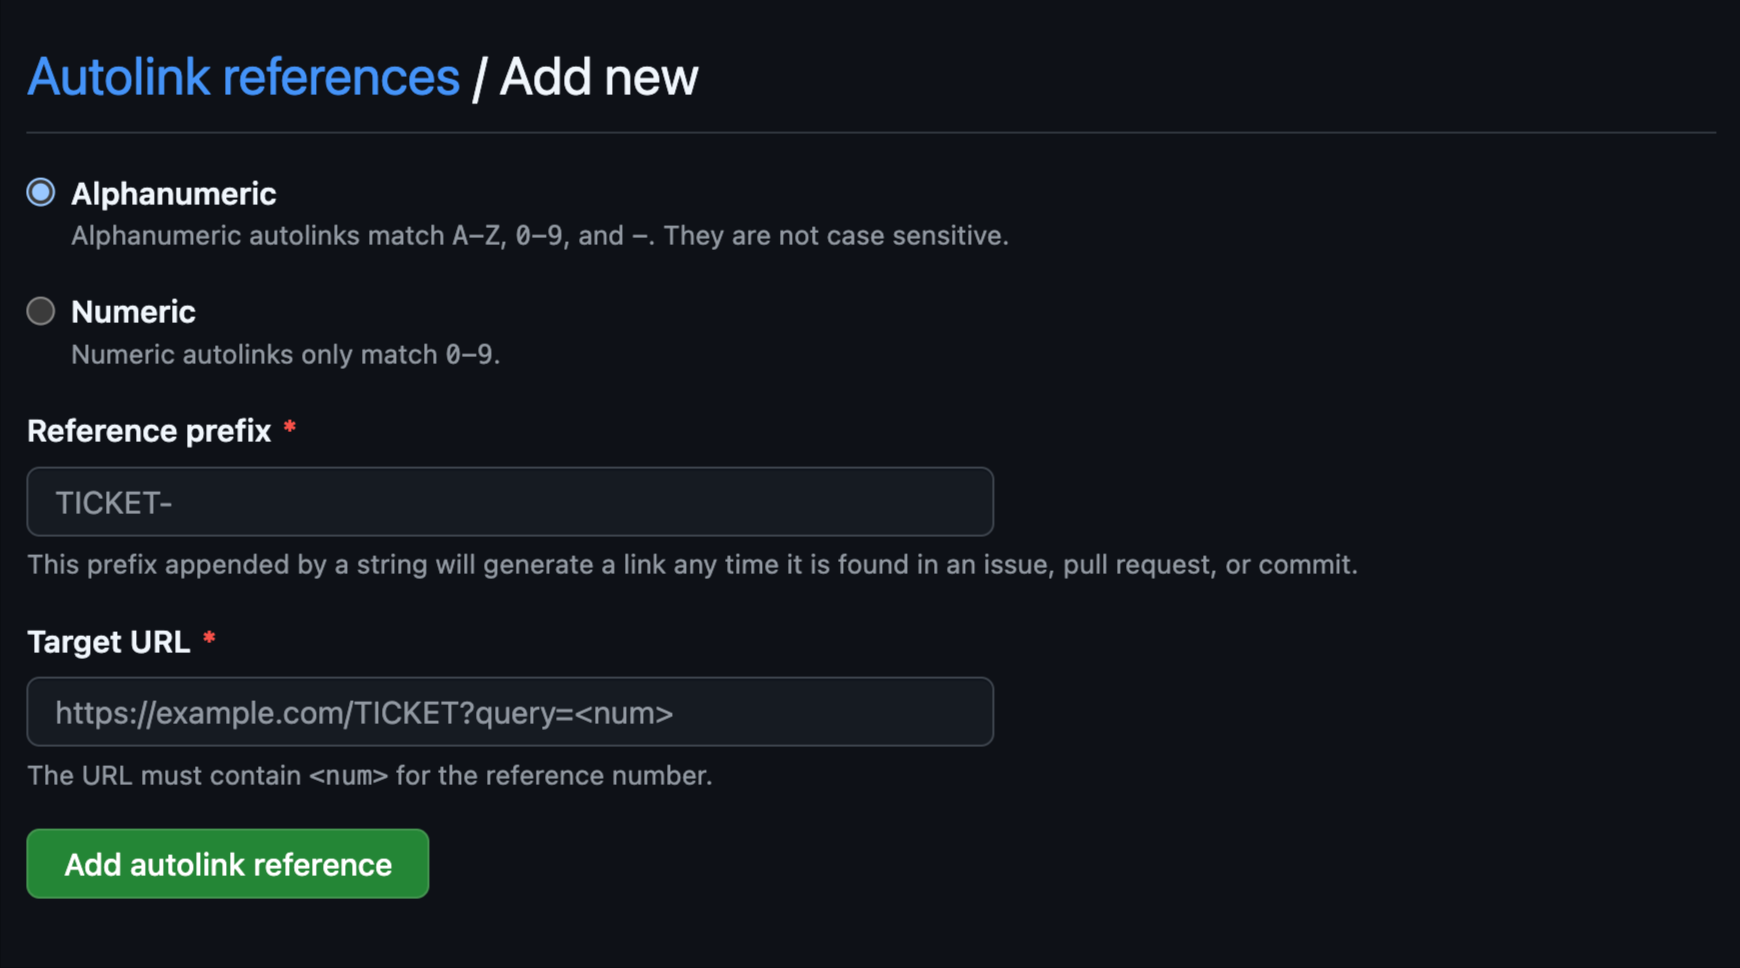
Step 4: Define Your Reference Prefix and Target URL

Options
Alphanumeric
Matches any combination of letters and numbers in the reference (e.g.,TASK-123).
Numeric
Restricts matches to numbers only (e.g., 123).
Reference Prefix
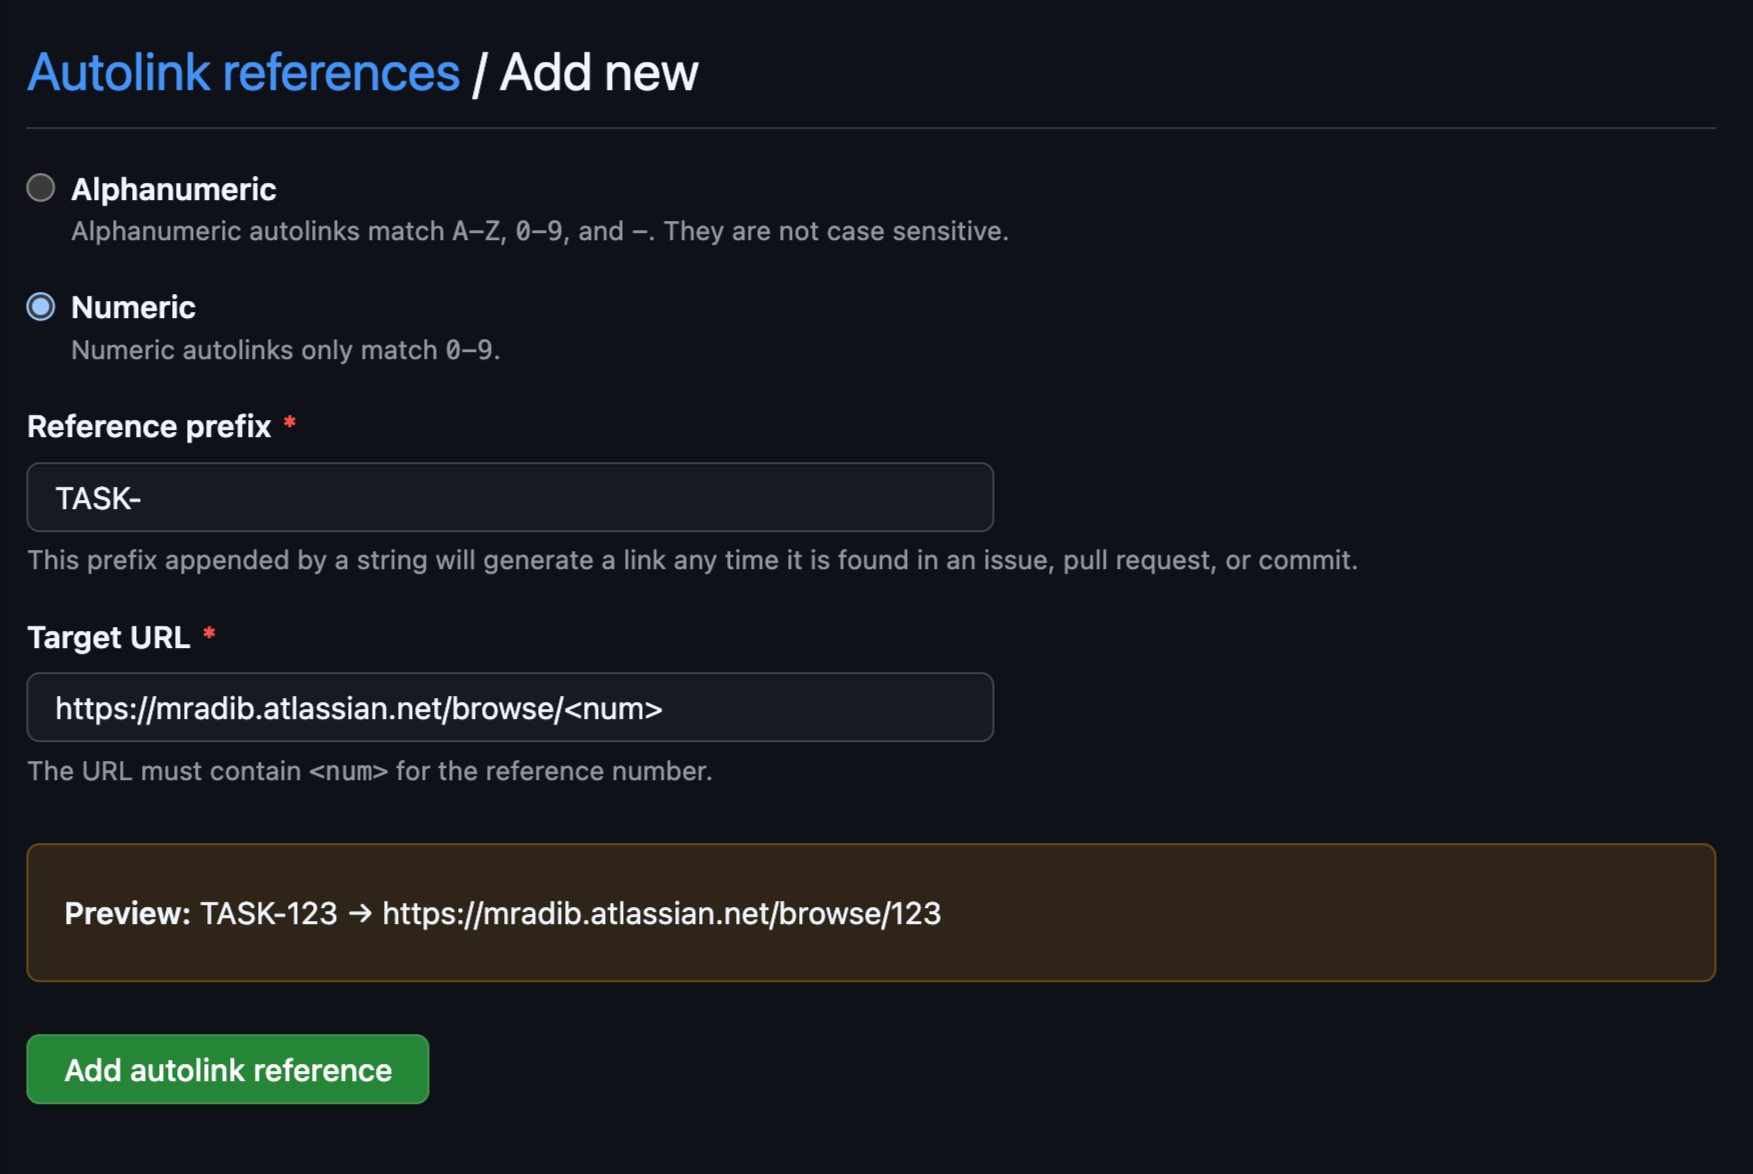
This is the identifier you’ll use in GitHub to create an autolink. For example, if you set the prefix to TASK-, then typing TASK-123 in an issue or commit message will automatically create a link.
Target URL
The URL format of your external system where <num> is a placeholder for the reference number. GitHub will replace <num> with the actual number from your reference. Example: For a JIRA ticket link, you might usehttps://[YOUR_PROJECT].atlassian.net/browse/<num>. So TASK-123 would become a link to https://[YOUR_PROJECT].atlassian.net/browse/123.
Step 5: Preview and Save
Verify the preview to ensure the link format is correct. If everything looks good, click Add autolink reference.

Step 6: Test Your Autolinks
Try referencing an issue in a GitHub comment or commit, such asJIRA-123 and see how GitHub automatically converts it into a clickable link.
Troubleshooting
Tips for GitHub Autolink References
- Ensure Unique Prefixes Avoid overlap with other prefixes.
- A GitHub Pro, Team, or Enterprise Plan to enable the feature.
- The URL Structure of the system you want to link, like
https://jira.example.com/browse/.
Conclusion
How GitHub Autolink References Enhance Collaboration
GitHub Autolink References are a must-have for teams using multiple tools. By configuring them, you’re not only saving time but also boosting productivity and improving collaboration. So set up your GitHub autolinks today, and take one step closer to a seamless, well-connected workflow!